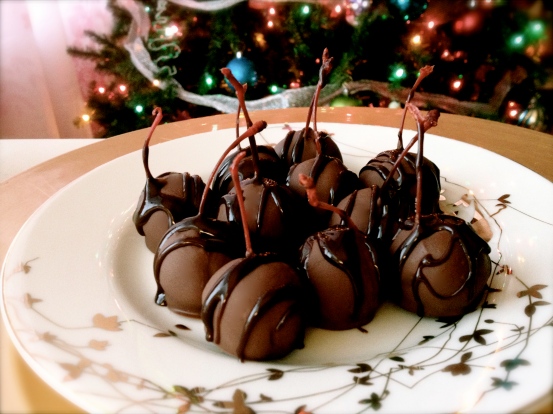
After making between five and six dozen Grand Marnier Chocolate Covered Cherries, I wasn’t sure I had much energy left in me to bake for work gifts and a cookie exchange beyond Pillsbury. But as photos of red and green food-colored sugar cookies in the shapes of stars and Christmas trees started popping up on my Facebook and Twitter feeds, it reminded me that they aren’t up to par in my recipe book. Now I know I might be coming across as sassy as my former roommate would say, but even if I’ve lost my Christmas spirit this year, I’m not going to be known as the person who baked sugar cookies. I have a reputation to uphold!
I recently saw a recipe on Annie’s Eats for Pecan Pie Thumbprint Cookies. I loved the idea, but, eh, not so much a pecan pie fan. Bourbon caramel apple pecan pie – yes. Traditional pecan pie – no. Then I remembered a Cherry-Bourbon Pie recipe I found in Bon Appetit that I had planned to bake to accompany red wine braised short ribs for a welcome home dinner in October that never happened. Better late to try than never, right?
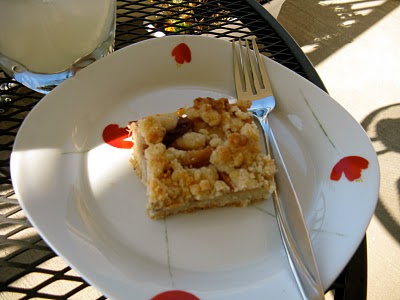
I made a few substitutions, including replacing the pecans in the dough with almonds to reflect the original pie topping. These might be hands-down one of the best cookies I have ever made. The verdict is still out – final judgement day won’t happen until the cookie exchange tonight. But at the very least, my boss immediately thanked me for baking “something other than a sugar cookie cutout.”
Add nine dozen cookies to the list I said I wasn’t going to be cooking or baking back on Thanksgiving Eve.
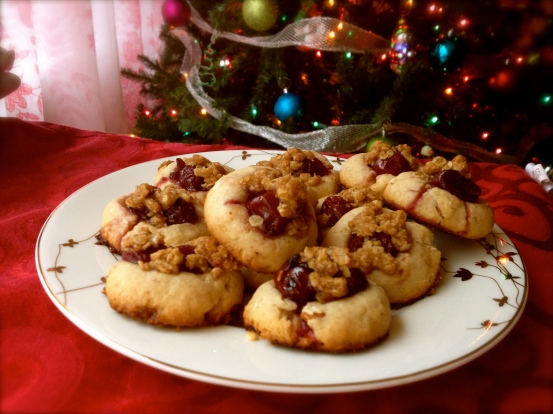
Bourbon Old-Fashioned Cookies
Adapted from Annie’s Eats and Bon Appetit
Makes approximately 3 dozen cookies
For the filling:
1 24.7-oz. jar pitted sour cherries in syrup, drained well (I used Trader Joe’s Dark Morello Cherries)
1/4 cup sugar
2 tablespoons bourbon
1 tablespoon fresh squeezed orange juice
1 teaspoon finely grated orange zest
For the dough:
1 cup (8 oz.) unsalted butter, at room temperature
4 oz. cream cheese, at room temperature
1/2 cup brown sugar
1/2 cup granulated sugar
1 tablespoon vanilla extract
1/2 cup almonds, finely chopped
1/4 teaspoon salt
2 1/2 cups all-purpose flour
For the crumble topping:
1/4 cup quick oats
1/4 cup brown sugar
2 tablespoons unsalted butter, softened
Combine the cherry filling ingredients in a bowl. Cover and refrigerate for 2-3 hours or longer before baking.
To make the dough, combine the butter and cream cheese in a large bowl with an electric mixer. Add the sugars and beat until light and fluffy, and then mix in the vanilla extract. With the mixer on low speed, add the almonds, salt and flour. Kneed the dough and cover the bowl. Refrigerate for 30-60 minutes.
Preheat the oven to 350 degrees. To make the crumble topping, microwave the butter for 15 seconds to soften. Add quick oats and brown sugar and stir with a fork to incorporate.
Spray baking sheets with Pam or line with parchment paper. Scooping about one tablespoon of dough at a time, roll the dough into balls. Place the dough balls on the baking sheets, and using your thumb (or I used a wine cork as suggested!), make an indentation in the center of each dough ball. Fill each indentation with about two cherries and their juices from the filling. Add crumble topping to each cookie.
Bake for approximately 16-18 minutes. I recommend removing cookies immediately from baking sheets and cooling on parchment paper or cookie racks. The baked juices from the cherries tend to make them a bit sticky until they’re cooled.